Saturday, February 28, 2009

The Chipmunk Theater

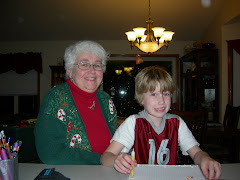
Hello! My grandson, Jacob, is here visiting and we enjoyed doing a craft project today. We're going to show you pictures and show you that you can have fun, too! First, we want you to see what Jacob made last spring when we were crafting............
...........lots of fun finger puppets!!!! Jacob would draw the designs and cut most of the shapes. I helped with some shapes that were small but he did most of the work. Aren't they neat?!! When we finished making them, we thought how fun it would be to have a puppet theater but we ran out of time. Then the next time he visited, the weather was nicer and we weren't doing as many crafts. But it's winter again and so.............

..........we took one large pizza box...........


then between the two of us we took some embossed felt scraps and glued them over the front of the pizza box (double click on the picture and you can see that we had to piece the fabric). To make the theater stand up "easel style", I cut and glued a felt strip from the lid to the bottom of the box. I did it before I hung the curtains but it would be better to do this step last!!!


Next Jacob chose blue for the curtains and because I've been doing so much crazy quilting, I had just the fabric for theater curtains. I cut two rectangles and folded over the edge of each side and machine stitched the edges. I did long running stitches at the top and gathered the pieces for curtains. I didn't bother to hem them as I knew it wouldn't show. While I glued the curtains to the inside of the box lid, Jacob was cutting out letters that he wants to use at the top of the Puppet Theater.

Here is cutting out an "E" from lady bug felt because his mom loves ladybugs. His first letter choice, though, is a "W" for Webkinz and there was a "W" already cut in the felt scraps I gave him to use. :-) And so................


............ here is the completed "Chipmunk Theater", complete with a new finger puppet that Jacob made .......... and it's a Chipmunk!! That's He designed the little guy and cut and glued him. My part was to sew the two pieces together. We work well as a team. :-)

Here is the back of the chipmunk as he peeks into the theater.....................


And here he is getting ready to run!!!


As you can see, we had a lot of fun making "The Chipmunk Theater". You can make one, too. Just get a pizza box (or any other box), felt and fabric scraps, glue, and scissors. And if you are making finger puppets, don't forget the wiggle eyes!!

We also had a good time last night when we went out to eat. I gave Jacob a choice of going to the grocery store for TV dinners or going to the Hogwild Eatery on Mainstreet. He thought about it and then chose the restaurant. When we got there, he chose a booth first and then decided we should take the window table which was nice because we could watch the traffic and other guests coming into the Hogwild. Then he ordered up the grilled cheese from the "Piglet" (kids) menu and I ordered the "All you can eat fish special". When the waitress brought our food, we couldn't believe how much there was on our plates. And so I took a picture..................
Of course, we had to get a box to take home left-overs which we ate a lunch. Then we made a quick stop at the library for books and videos. Watched a movie and then got out a puzzle and did that. We started another puzzle tonight but it may not get done before I have to take him home tomorrow. So, that's what we've up to. Time now to get some sleep.
Jacob and Grandma Skeeter

Tuesday, December 16, 2008

Every time a bell rings............

If you've ever watched "It's a Wonderful Life", you know that Zasu tells her daddy that "every time a bell rings, an angel get's it's wings". I think that's a sweet thought and since our library program had a connection to the movie, it was only natural to make bell ornaments as a favor for each guest. Several years ago, I made a similar bell ornament for my tree. I called them "Santa Bell" ornaments and told the kids in my class that if they made them and hung them on the bottom branches of the tree, they would hear them ring when Santa put their gifts under the tree. That little story had it's roots in the fact that when my kids were little, I hung all my bell ornaments on the bottom branches so that if they were sneaking peaks at gifts under the tree, the ringing bells would signal me to peak at them and see what they were up to!!! Love to recall those good Christmas memories!!
This little bell ornament is so easy to make that you can make lots of them and you can add them to your tree or decorate packages with them, whatever you wish. Start by picking up a bag of bells (the larger jingle bells work best), a package of glitzy chenille stems, a roll of Christmas ribbon for the bows and a roll of narrow ribbon for the loops.
Remember - just "double-click" on any of the pictures for a close-up view.


Step 1 - To make one bell ornament, start with one bell, one loop (cut a 7" piece of narrow ribbon, fold in half and tie a know at one end - see the picture above), one chenille stem and one piece of pretty ribbon (12" length).

Step 2 - Fold chenille stem in half (1.) and cut with wire snips or old scissors. Slip chenille stem through bell top (2.). Turn chenille stem ends up (3.) and then cross over and do one twist with the chenille stem (4.). Bend the ends to point straight out (5.).

Step 3. Lay the length of pretty ribbon at the crosspoint of the chenille stem and place the loop on top of the ribbon.

Step 4. Fold the right end of the chenille stem over the ribbon and loop.

Step 5. Fold the left end of the chenille stem over the ribbon and loop. Now your ribbon and loop are secure.

Step 6. Bend the rest of the chenille stem ends around the top of the chenille circle so that you cannot see them.

Step 7. The last step is to tie a bow with the pretty ribbon and your ornament is finished!! No glue, no glitter mess........just a pretty little jingle bell ornament!! Make lots and give them to all your friends and family!!!

At the beginning of this post, I mentioned the Santa bell ornament I taught to kids. This is it in the photo on the right. There's a quick way to create this one and I'll be back in a couple of days to share how we did this one. Jacob and Sara (who is just 5) made these a couple of weeks ago and they are very easy to make, too. You need the same supplies for this ornament as you did for the Little Bell ornament.....except you need two sizes of bells so pick up a bag of larger bells and a bag that are slightly smaller. There's another version of this bell that involves intertwined hearts so I'll be sharing that one, too.
Have fun making the bells ring!!
Grandma Skeeter and Jacob


Friday, December 5, 2008

Christmas ornament fun!

My grandson was here last weekend and I promised him that I would post photos of the ornaments we made and here they are..........

I bought a couple bags of chenille stems at Michael's - some just fuzzy and some glittery. Sara, our neighbor girl, came over and made ornaments with us. They each made three ornaments and these are Jacob's creations. I showed them how to do the candy cane and bell ornament but the heart trio was his design!! Pretty cool, huh?

I had another project for him to do when we were finished with the ornaments. I took a Christmas panel that was intended to be ironed on a sweatshirt and instead turned it into a Christmas banner. I ironed the fusible web on the panel and had Jacob cut out the smaller pieces and he wanted me to cut out the tree. Then I took a rectangle of heavy red cotton fabric and ironed over an edge 1/2" on all sides and then sewed the white trim around three edges. I folded the top over and using fusible web, ironed it in place to create a pocket for the dowel. Added a ribbon to hang it with and some bells for some holly jolly jingle!! And here's his finished piece.......a nice gift for his mom. We did another project for his mom that I'll share next week.


Saturday, November 29, 2008

Jacob's Car Pictures

Last summer, my grandson, Jacob and I got to see lots of cool cars. This blue one is a Mustang that was at the car show for Lehigh, Iowa's 125th Celebration on Father's Day weekend in June.

The next weekend Jacob came to visit us in Henderson and these cars were in the parade for Henderson Sauerkraut Days.


Jacob really likes Mustangs.

Jacob is here visiting again and we have had lots fun together this weekend. We went shopping, bought some toy cars, Christmas presents, wrapped lots of little Christmas presents for Jacob's mom and made Christmas ornaments with Sara. Later I'll post the ornaments that they made so that maybe you can make some, too!!!


Sunday, October 19, 2008

There really will be pictures and projects.......

Really, there will! It's just that "real life" took precedence. All things come to those who wait so soon the wait will be over and there will be fun stuff to read, to see, and to do!
Grandma Skeeter

Monday, July 7, 2008

Memories of childhood

I have great memories of my childhood. It's those memories that inspire me in my quilting and craft projects, in the designs I draw and the stories I'll share. I recently discovered "the world of blogging" and thought it would be fun to set up a blog to share with my grandson. We are going to post pictures of the projects we do together and I will also tell you of things I did with my kids when they were young and what my mother did with my brother, sister and me when we were kids.
This week, Jacob, my grandson, is on vacation. He and his mom and dad are at a campground not far from home that provides a nice place to relax and yet doesn't cost much to get there (less than an hour from their home). While he is vacationing, I am going to get a "head start" on our blog and then next week, he will have something fun to look at when he returns from vacation.
I will post some pictures of our projects and, I'll also tell you why he calls me Grandma Skeeter.